


How to Get Google to Quit Tracking You.
 Where you go, Google goes. According to a recent report, Google continues to track your mobile device even if you’ve opted out of its tracking services; Google’s Location History continues to store location data. If you’re looking to shut down Google’s ability to see where you are, here are a few steps you can take.
When you have location services turned on, Google constantly pings your phone from cell towers and Wi-Fi and is using GPS to see where you are. The frequency with which it finds you can be every few minutes or every few seconds, which paints a pretty accurate picture of where you are at all times.
And Google Maps keeps track of every step you (and your smartphone) take. Your activity is then archived in your Google Timeline. The feature, introduced in 2015, can be a walk down memory lane, but it can also leave the door to your privacy wide open.
With Timeline, Google Maps can not only show you where you’re going but also where you’ve been. There might even be photographic evidence, since Timeline syncs with any shots uploaded to Google Photos. You can also share your location with anyone in real time on iOS and Android.
If this all seems less helpful and more harmful, you can remove your location history and tell Google to quit it already and stop following you. Here’s how.
Any Device
There are a few things you can do regardless of what kind of device you have. To stop Google from tracking, you can go to myactivity.google.com under your Google account. On the left-hand drop-down menu, click “Activity Controls. You can toggle off “Web & App Activity” and “Location History” to stop Google from storing your precise locations on your account. Note that turning these services off will directly affect Google Assistant and Google Home.
To delete any past location tracking that Google has saved up to this point, you have to do so manually. On myactivity.google.com, you can view everything you have done on your device, including Google searches and Google Maps directions. Go through this list of activities and delete individual results by tapping on the three dots icon, then tapping “Delete.”
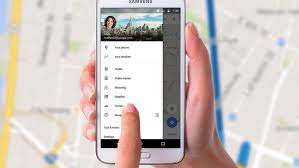
Android
If you’d rather not have your Android phone tracking your location, go back to Your timeline and tap on the three dots on the upper-right corner.
- Select Settings
- Scroll down to Location Settings.
- Tap “Location History is on.”
- A new window will appear; toggle the switch to turn off for your specific device or all Location History across your entire Google account.
To delete all your location data, scroll down to Location Settings and tap “Delete all Location History.” A pop-up will warn you that everything is about to be deleted, which might affect how Google Now and other apps that use Location History work. If that’s okay with you, check the box next to “I understand and want to delete” and then Delete.
To ensure that Google no longer stores any location data, you’ll have to play around with your phone’s settings. Under your phone’s main settings menu, you can find your device’s location settings. You have the ability to disable location services for specific apps or to disable all location services for the entire phone. Be advised that many of your phone’s apps and services will be unusable at this point.
Instead of disabling half the services on your phone, you may prefer to install a virtual private network (VPN) in order to keep your activity and data private. There are plenty of services to choose from for your Android device.
Like on Android, select the hamburger menu, and tap Your timeline to see recent locations. To wipe a location out of your history, tap the three dots on the top-right and tap “Delete the day.” You can also navigate to Settings > Maps History and tap the “X” next to a location you want to delete.
Google typically tracks your location whether you are using an app like Google Maps or not. But you can set your phone so that this happens only when you’re actually using the app. Go to Settings > Privacy > Location Services, then select Google Maps or another app, to adjust location settings to “While Using.” This can be helpful when you want the phone to remember where you’ve been for future searches but not to constantly track you.
If you typically use Google as your search engine, it might be a good idea to switch to Bing or DuckDuckGo. If you’d prefer to keep using Google, you can turn off location data collection in Settings > Privacy > Location Services > Safari Websites, and then switch tracking off.
Like on Android, you can turn Location Services off completely by navigating Settings >Privacy > Location Services. This will disable Google Maps and Apple Maps from giving you proper directions on your phone.
Web
You can also clear your history from a desktop. Go to Google Maps and sign in to your account. Select Menu and then Your Timeline. You’ll see every place you’ve been while Google Maps has been with you.
You can delete just one day by selecting the day on the top left and clicking the garbage-can icon.
To delete your entire location history, go to the Timeline, click the gear icon on the right side of the screen, and select “Delete all Location History.” Like on mobile, a pop-up will ask you if you really want to do that. Check the box next to “I understand and want to delete all Location History” and then “Delete Location History.”


